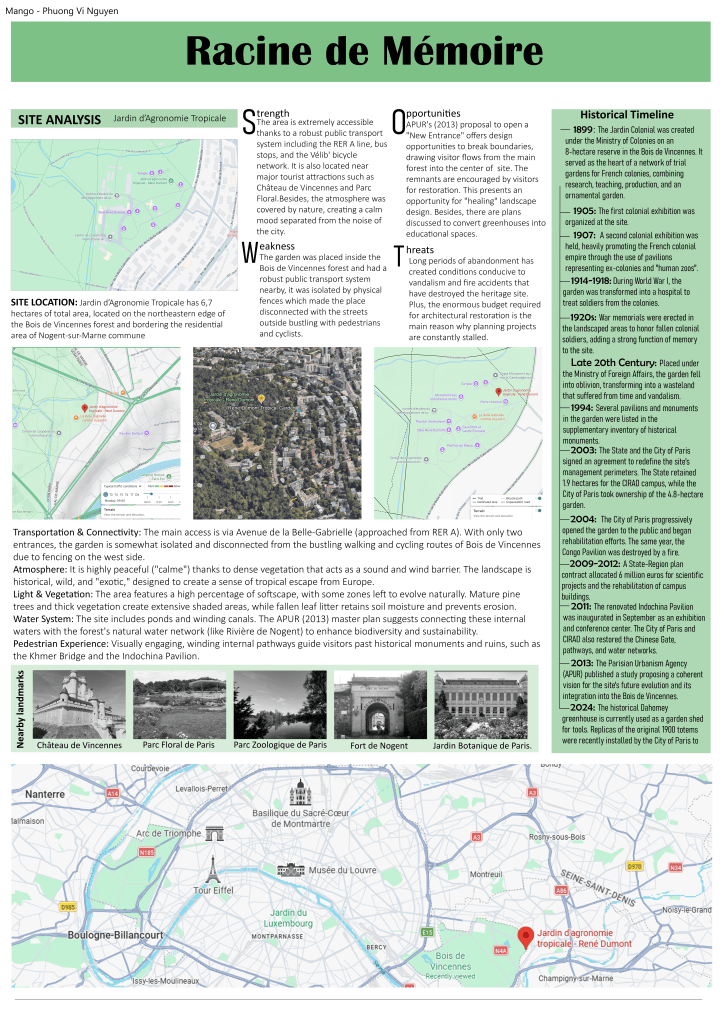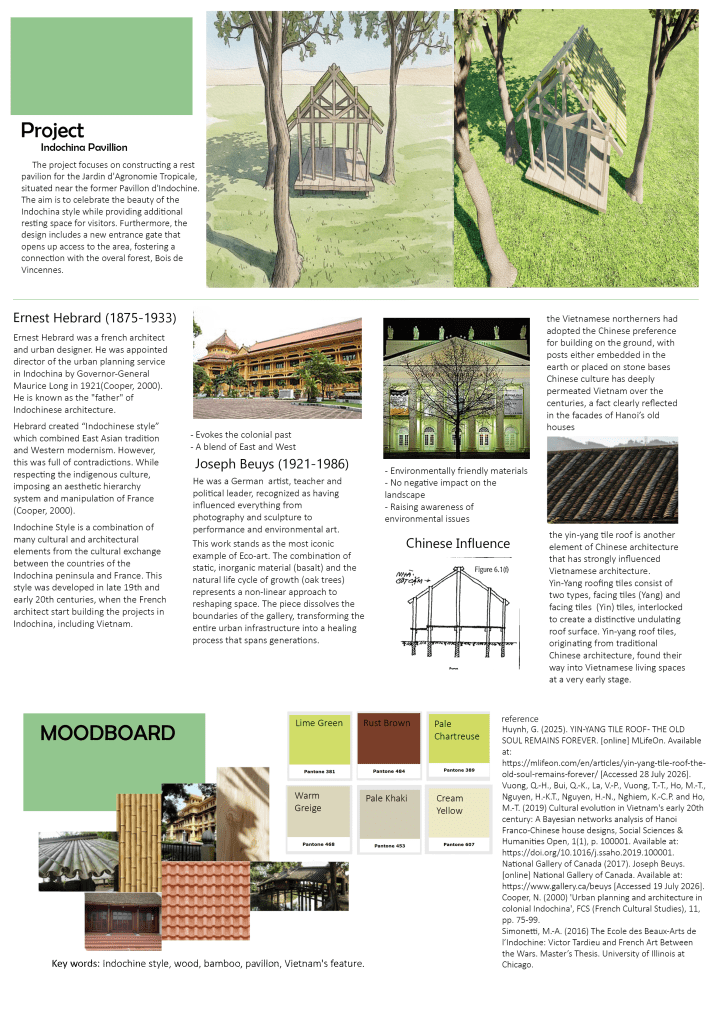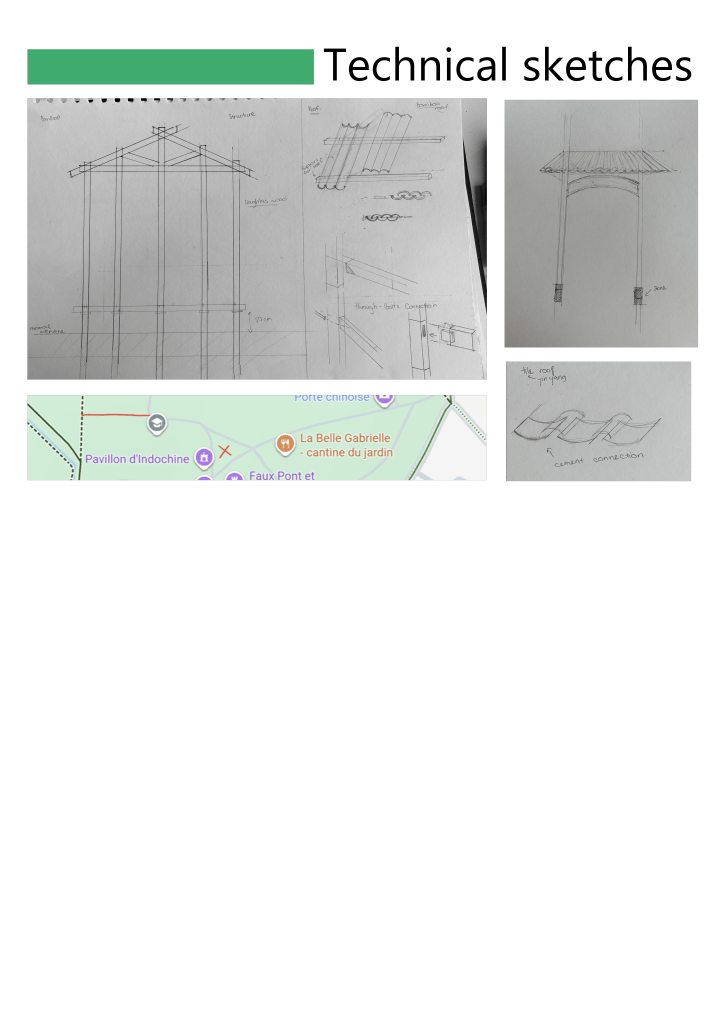
Week 9-10: Maya for 3D printing and Photoshop for design sheets
In week 9, I had printed out some of my experiment with scale when using maya but it was not good which I prepared before booking an appoinment with a tutor in the print workshop.
The experiment was so small in scale and got mistakes in the printing process. So the tutor introduced me the Bamboo studio software to visualise my models before printing. The software was really helpful, it made me realise that I had set the wrong scale the whole time
Also, I changed my design of pavillion to suite the indochina and Vietnamese architecture style.
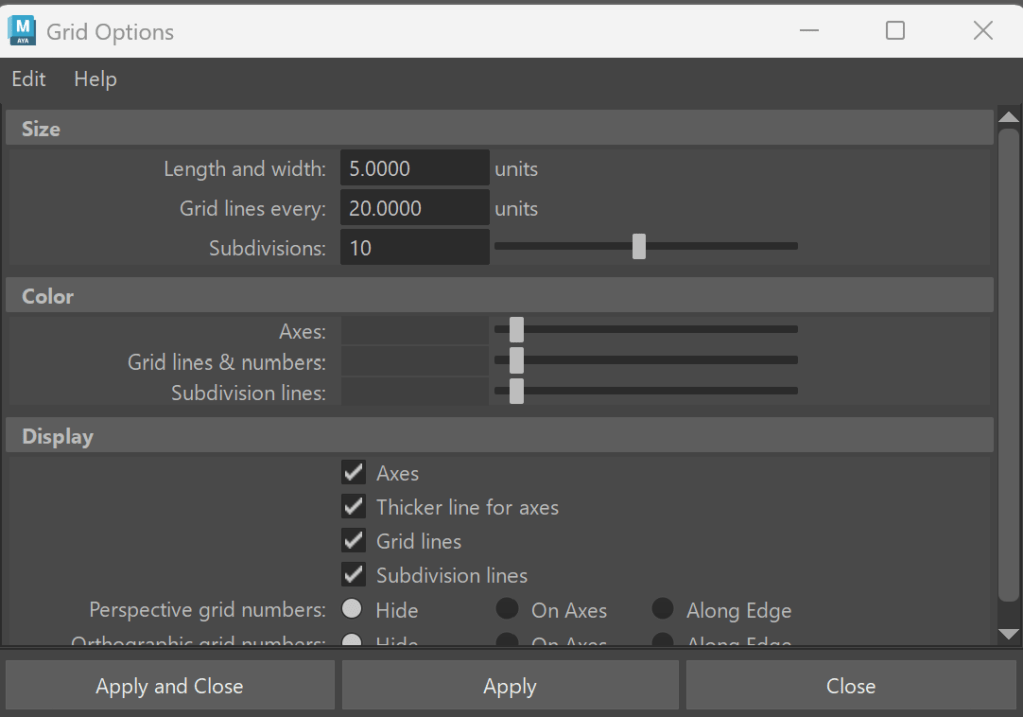
This is how I set my grid and scale before.
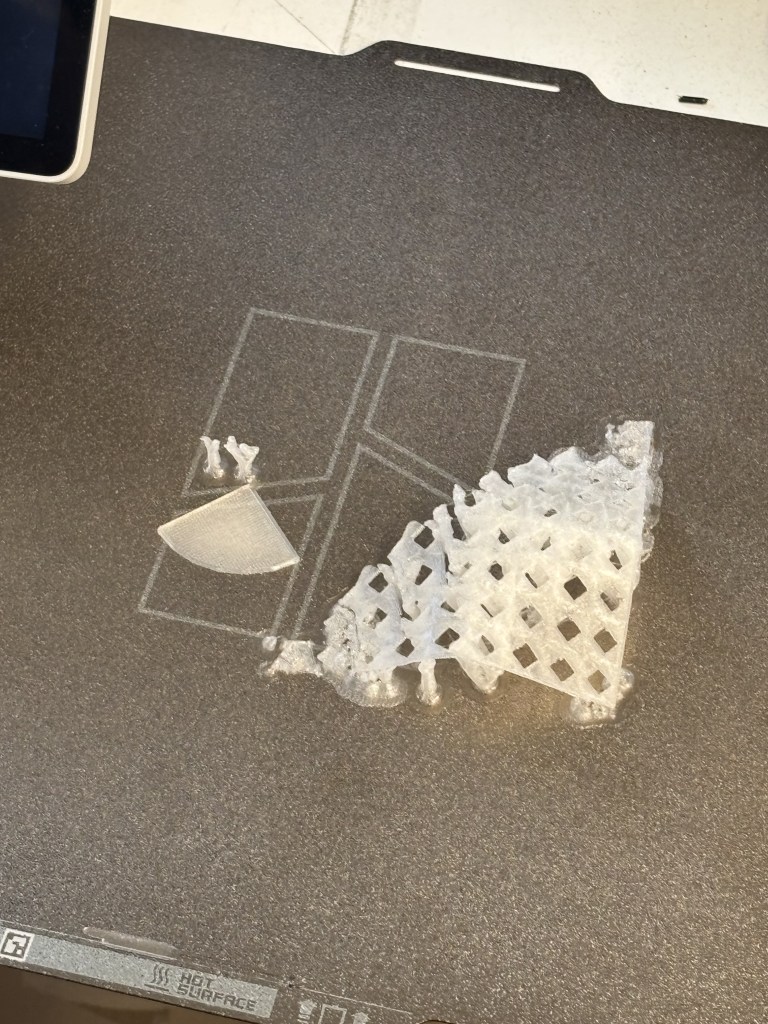
After printing, this is the size of the object which is really small and can not be printed so well. Then I dowload Bamboo studio software to experiment.
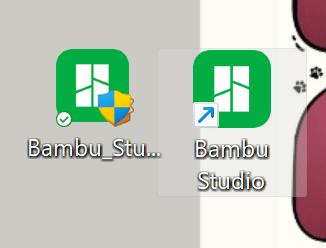
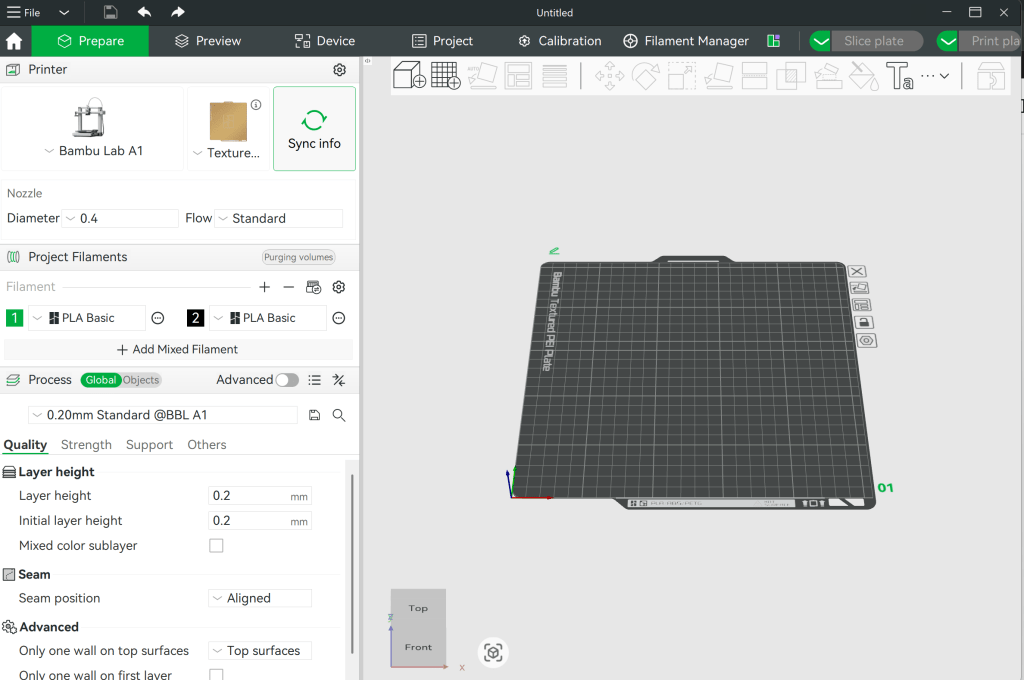
This how it look like after I dowload, the tutor told me to set the machine is Bamboo Lab A1 which is the type of the machine he has. Then I kept export file with changing the grid and scale until I got the right size
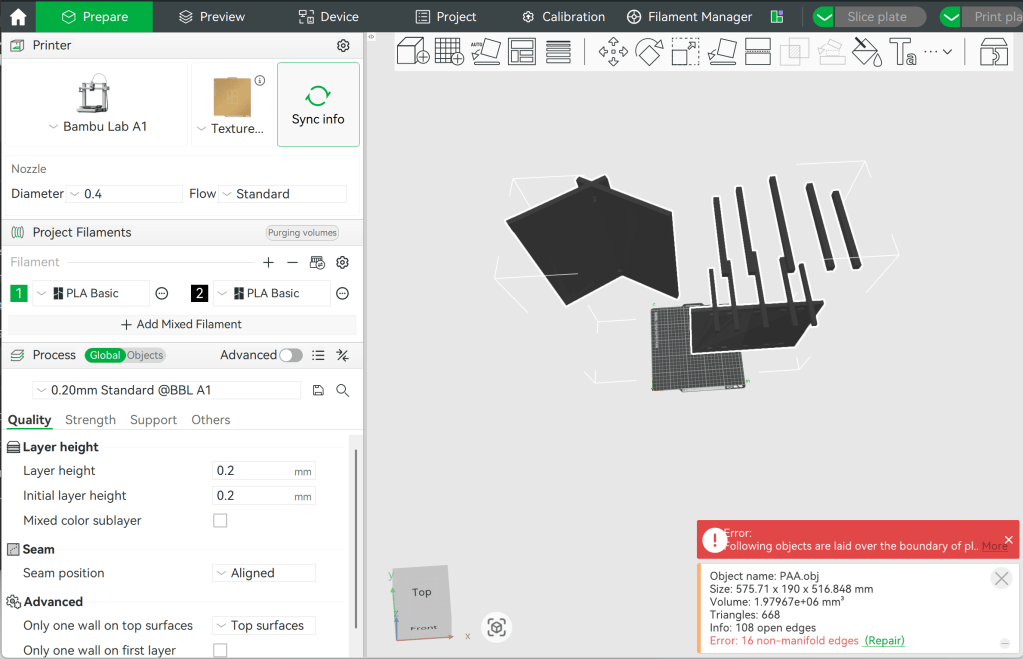
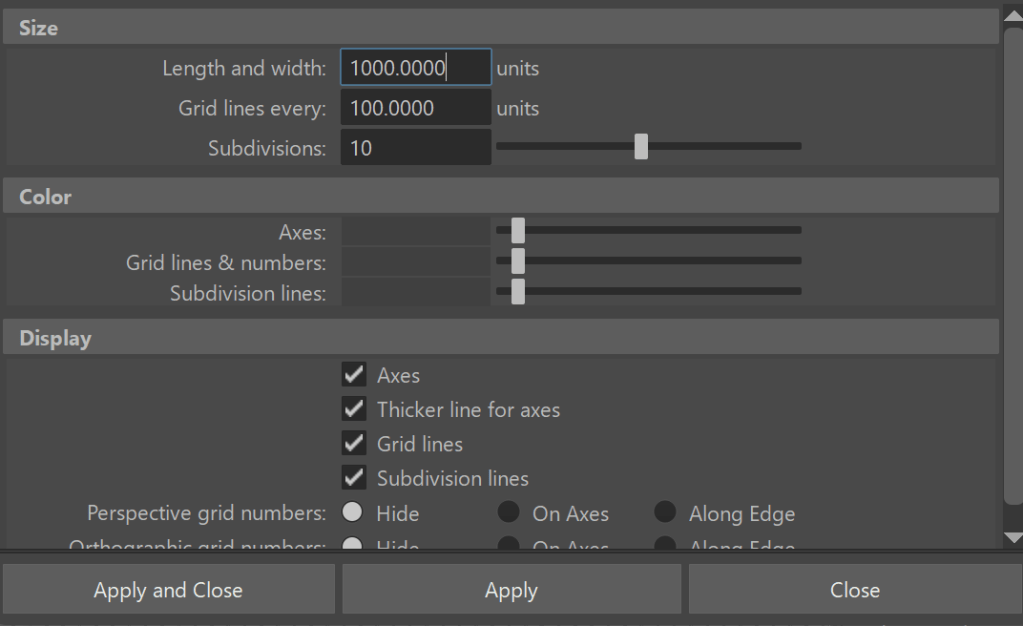
This time I set them too large which can be print. When i set lenghth and width is 1000 unit and Grid lines every is 100 unit.
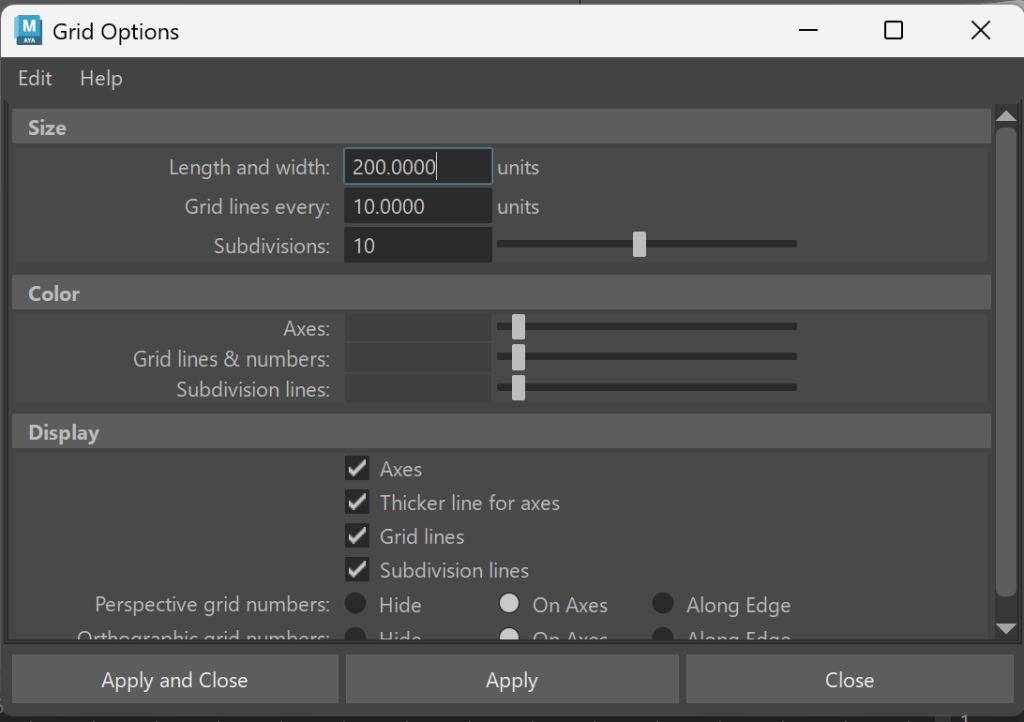
Then after that I changed to Length and width: 200 and Grid lines every: 100. I also turned on the axes to see the grid numbers.
Pavillion:
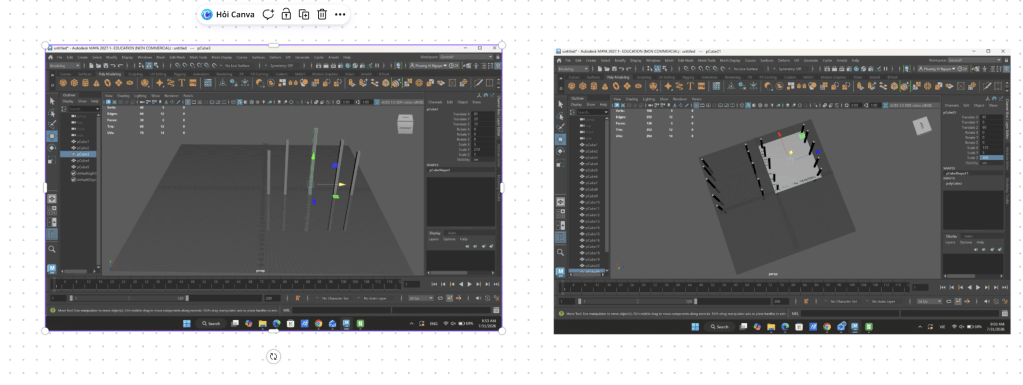
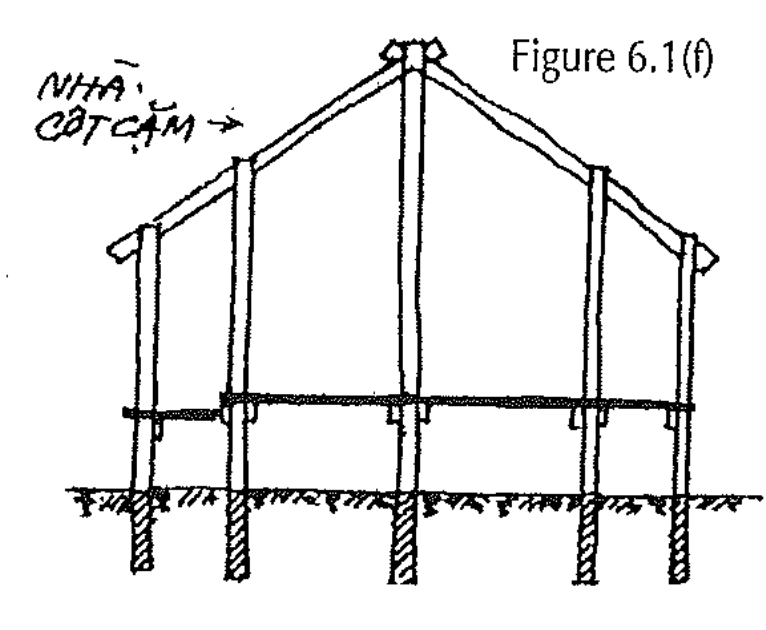
First, I created column by using polygon in poly modeling, I created 5 column with different height to make the shape of the structure below.
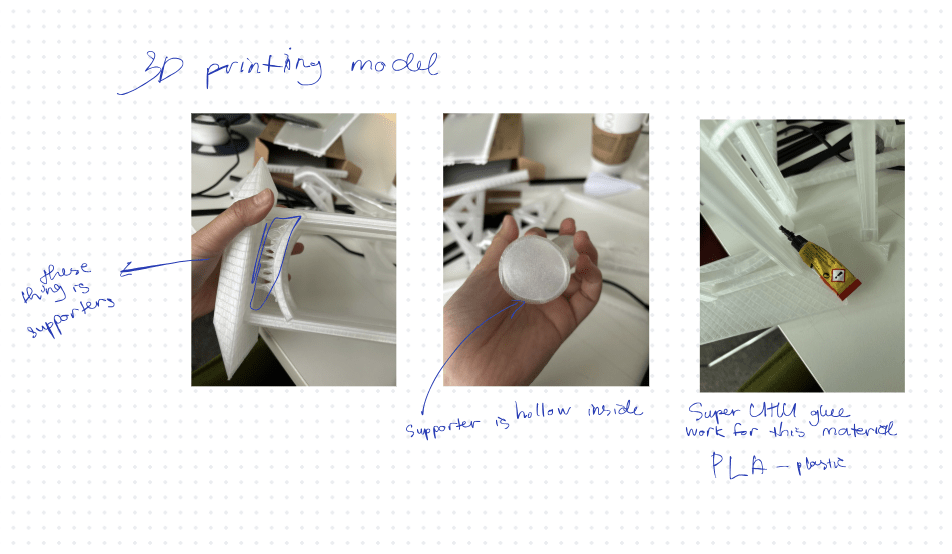
Then I duplicated 5 columns to created the columns in the back. After that I kept duplicated 10 column then moved them into another section. The reason for this that I can not make a whole pavillion then print it out, my tutors said that i need to separate part then attached them together.
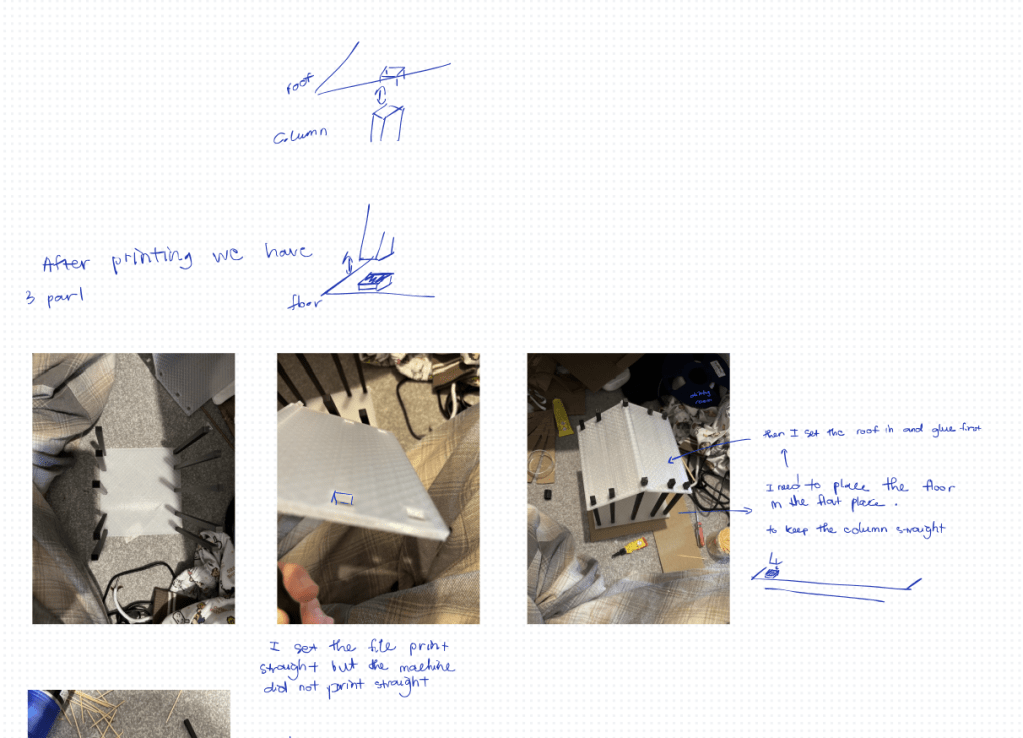
Next step, I created the floor with 160×170 size then using bolean tool to merge and created holes, so I can stick the column insides after printing. The holes need to be bigger than the columns ( around 0.1mm-0.3mm).
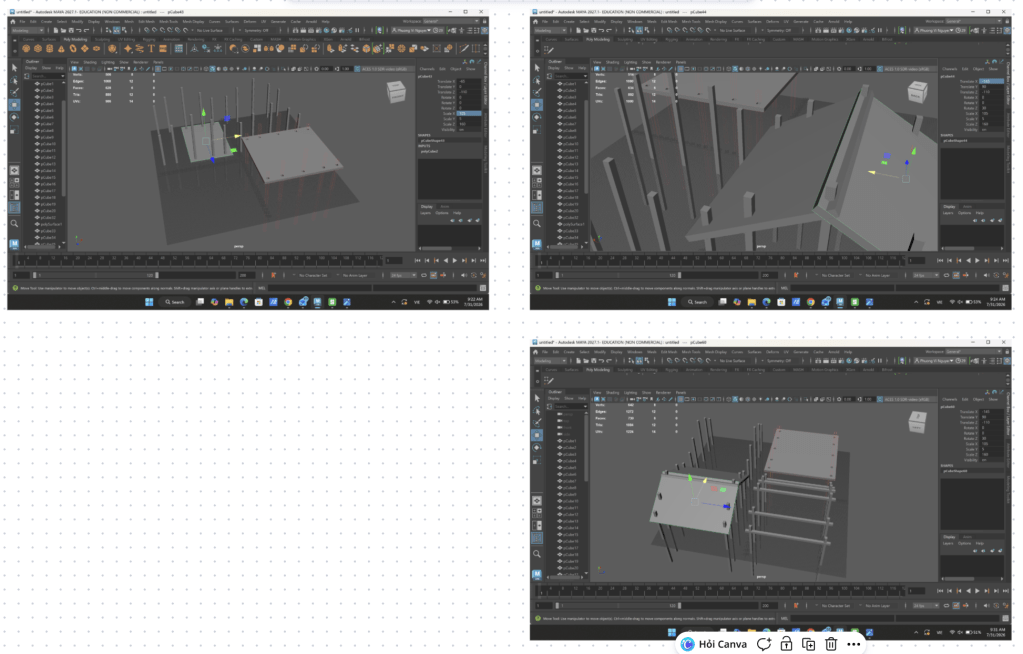
Next step the roof part. I created a triangle cube shape (105×160) then set it tilted at a 30-degree angle. Then I duplicated it and do the same thing + miror duplicated.
I forgot to do the joint points of the floor so I deleted the floor part and redo it but combine the joint points.
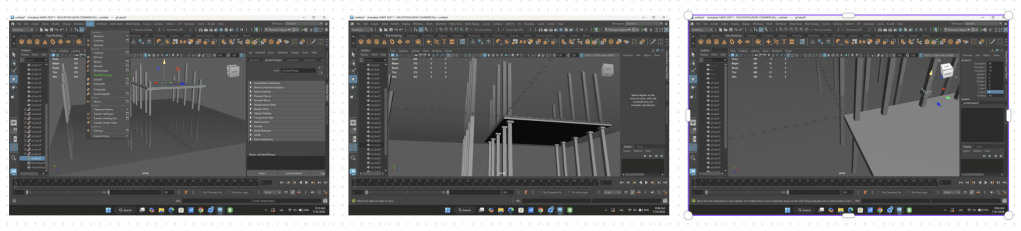
I created 10 joint pointed for each column which a littble wider than the columns. Then I used combine tool in Mesh to combime these joint points with the floor. Next step is I used Boolean tool to created holes. I needed to choose the floor part first then choose the all columns.
Bamboo Roof
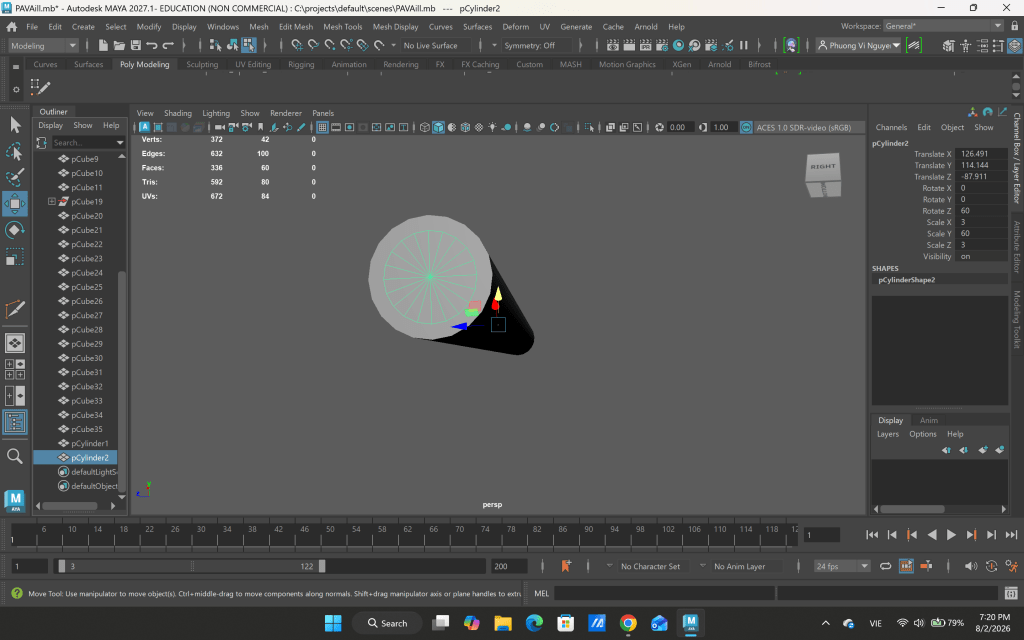
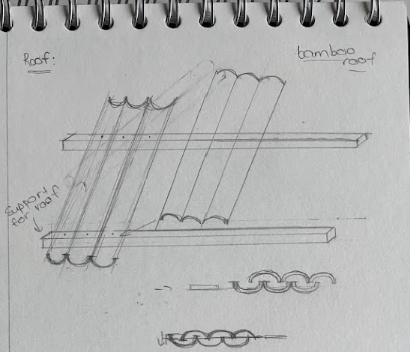
To create the bambo part, I created cylinder shapes which had 1 big cylinder and a small cylender inside. Then I used boolean tool to create the hole part of a bamboo.
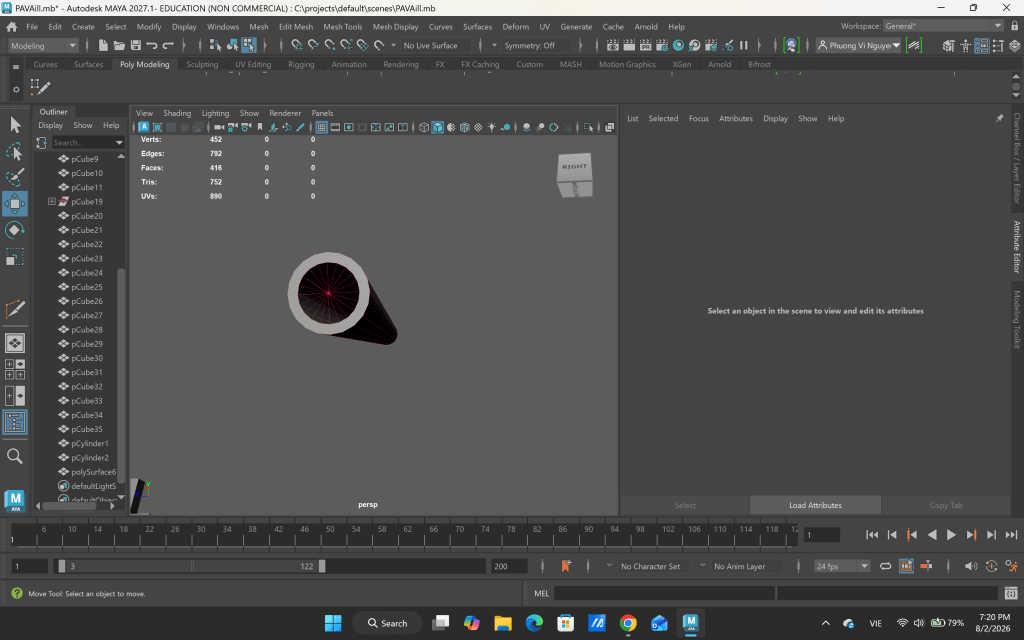
Then I cut it in half.
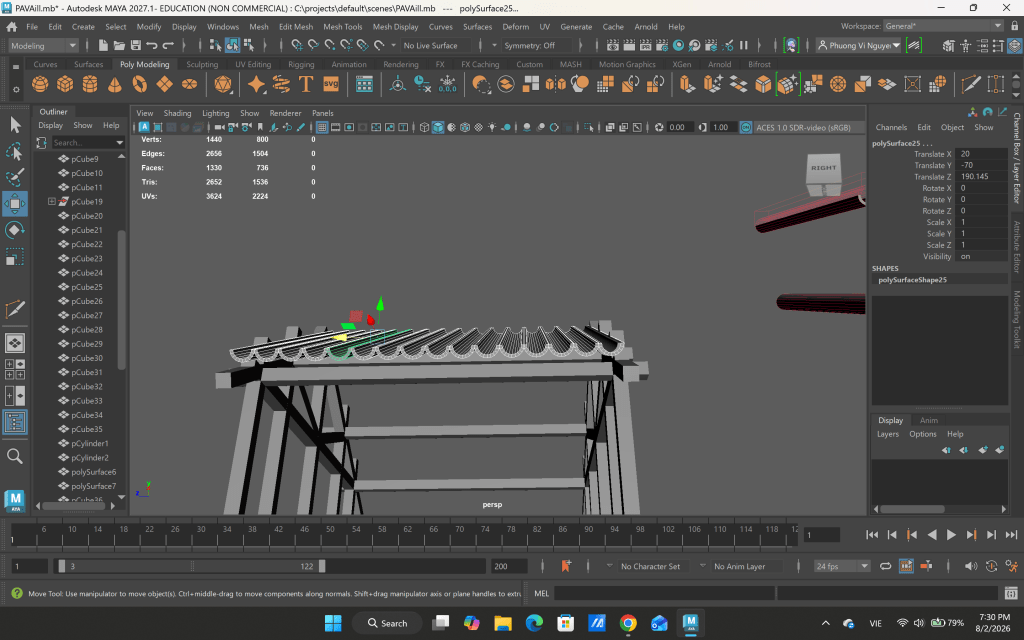
Next step is I kept duplicating and aranged each bamboo next to each other. I group them all by Control + G. I duplicated the group then flip the group.
For the material, I used twinmotion to apply the material for the pavillion. And, I need to export the file to fbx. file.
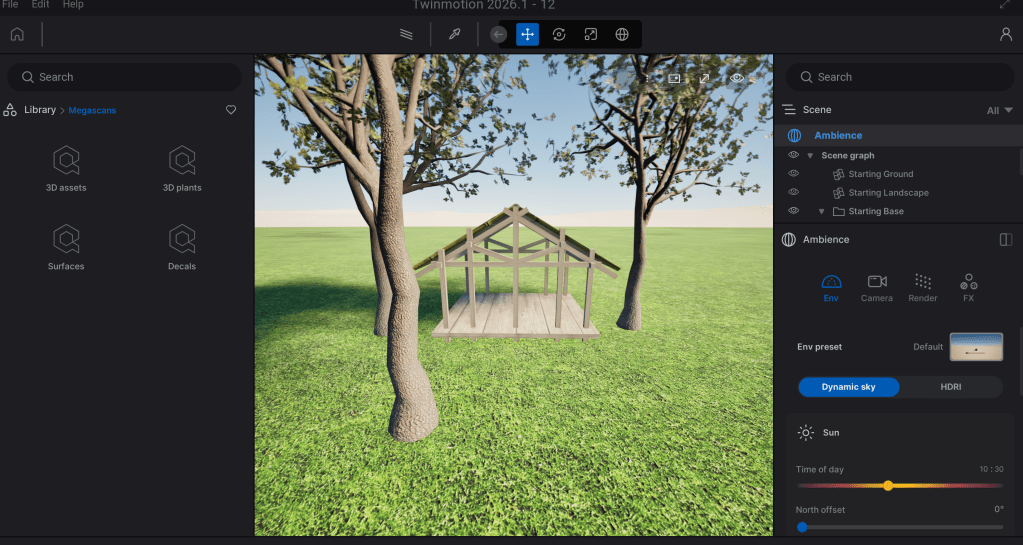
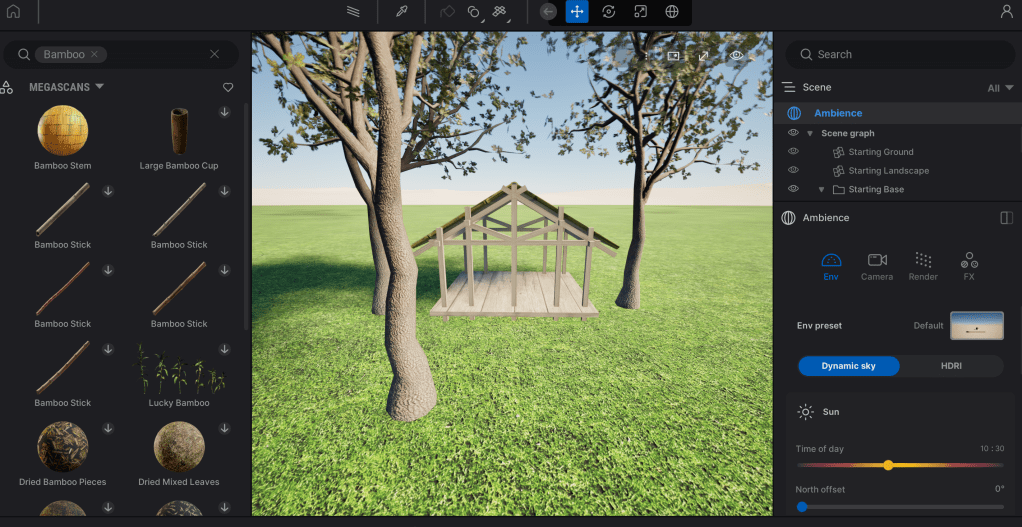
In the library, I choose megascan to search for the material or I can search directly on the searching bar. I drag the material into the object I want.
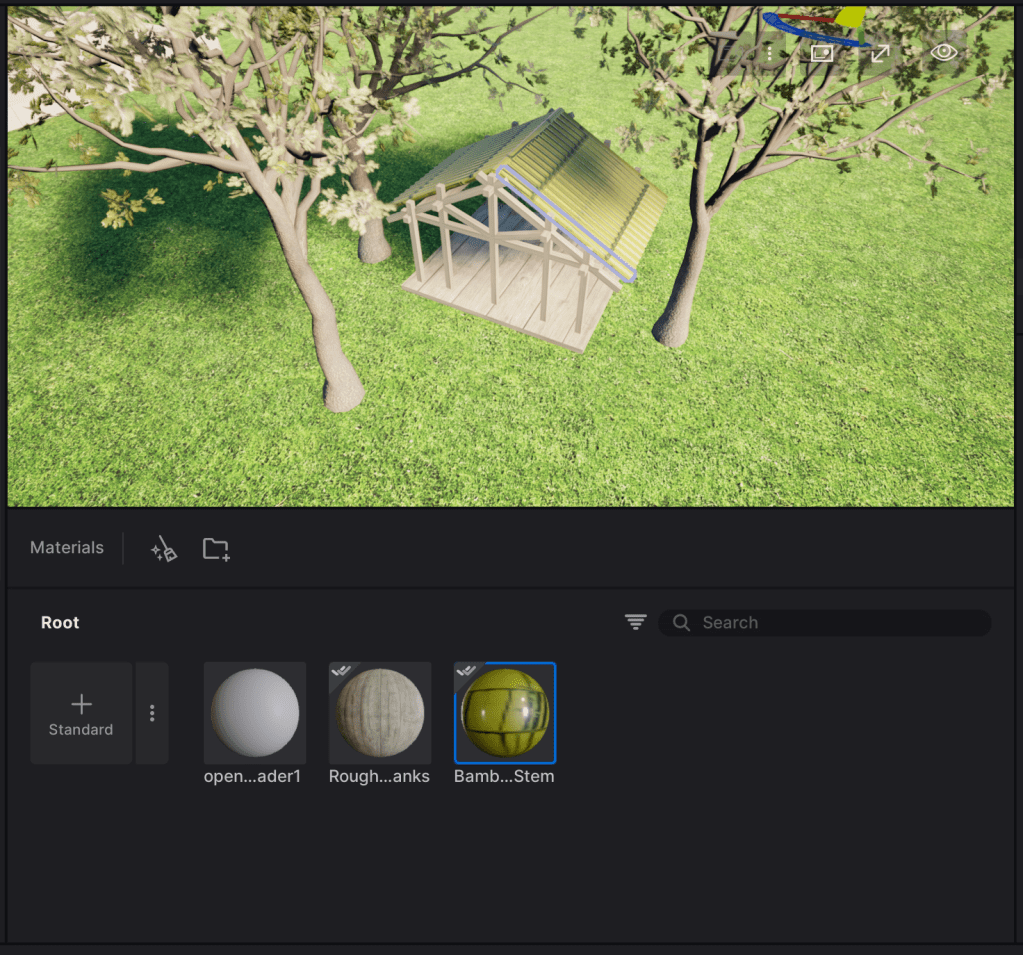
I also apply the material for the column which I search the keyword of what I want to put in.
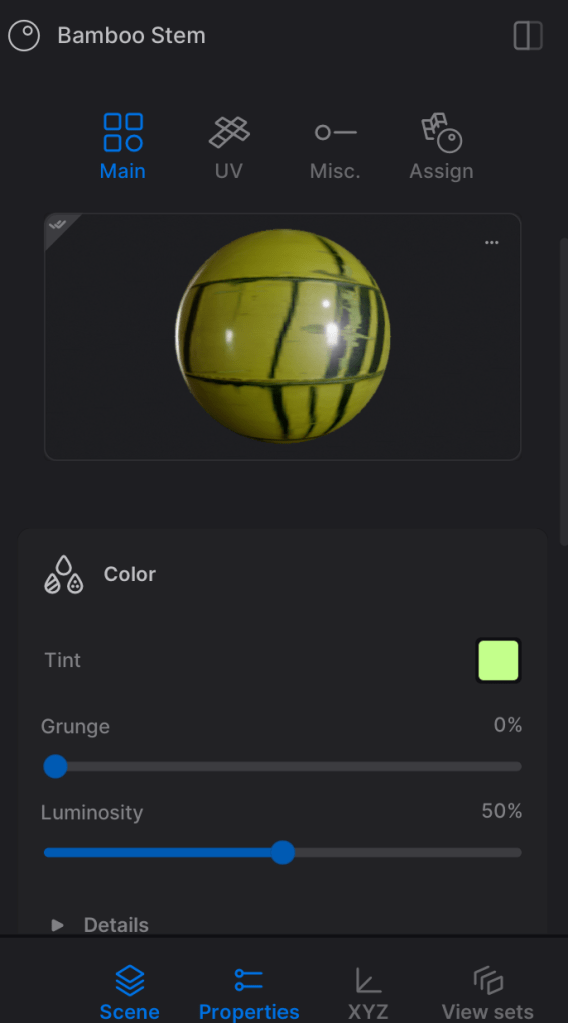
After applying material I edit the color and other elements in properties bar.
The new entrance:
I combine my experience and this video from youtube to create the entrance.
To create the trapezoidal block for the yinyang roof tile.
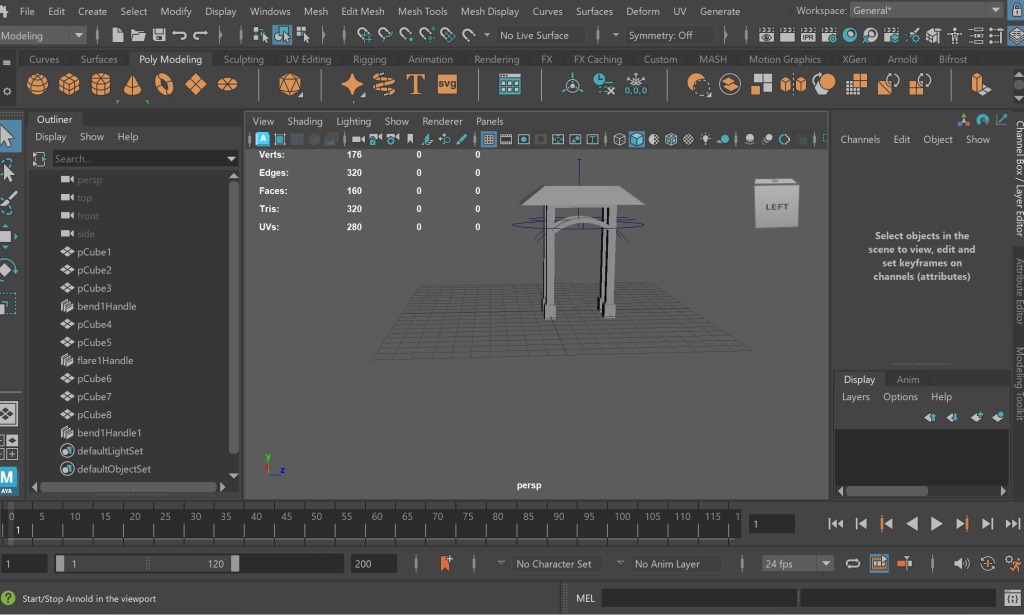
At first, I created a polygon cube then set then set the size as a rectangular block. I used nonlinear tool in Deform tab.
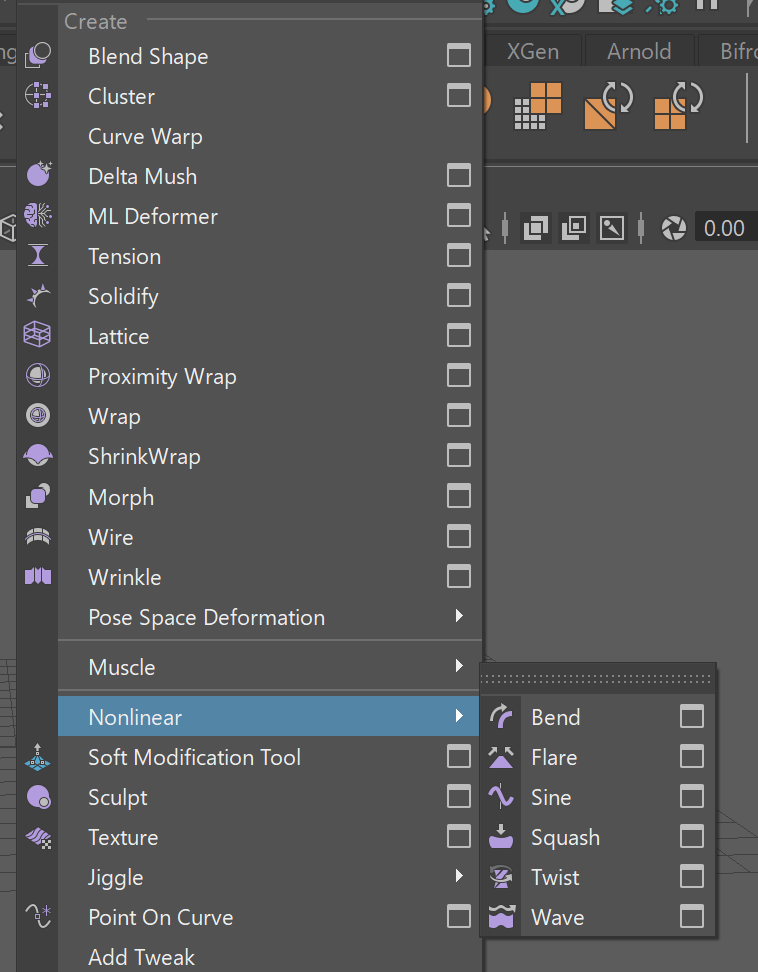
Choosing Flare.
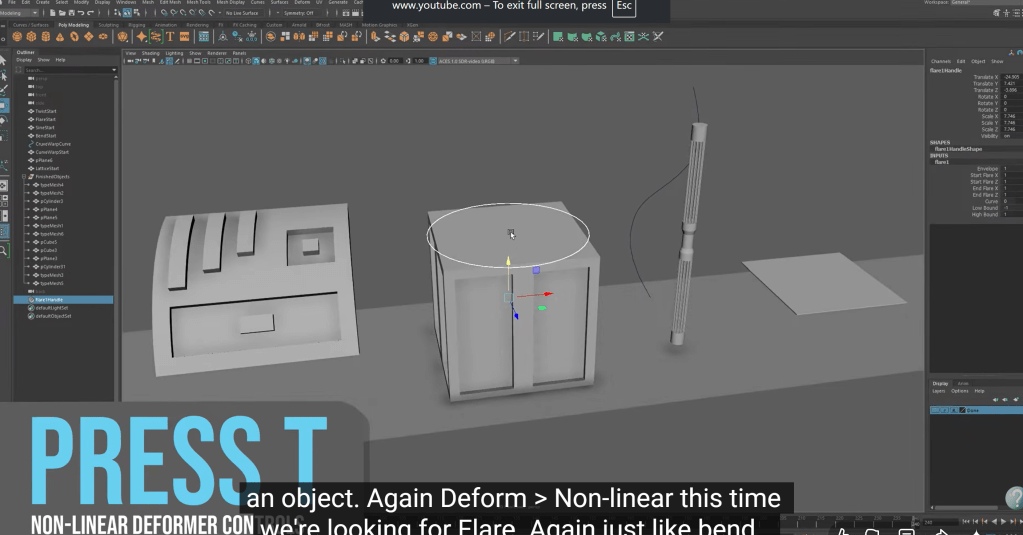
Then it will have the circle line as the video showcase. To change the shape -> press T.
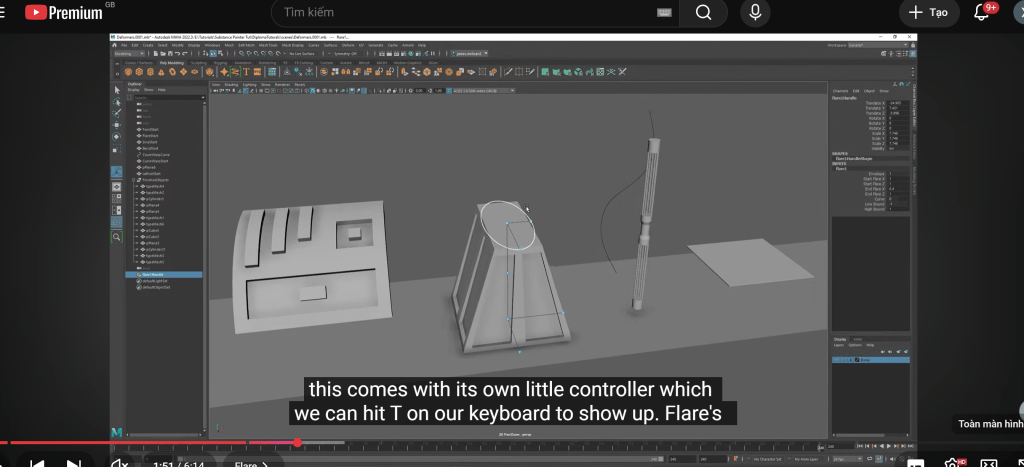
Also using the nonlinear tool ( bend) in Deform tab to create the curved part of the entrance.
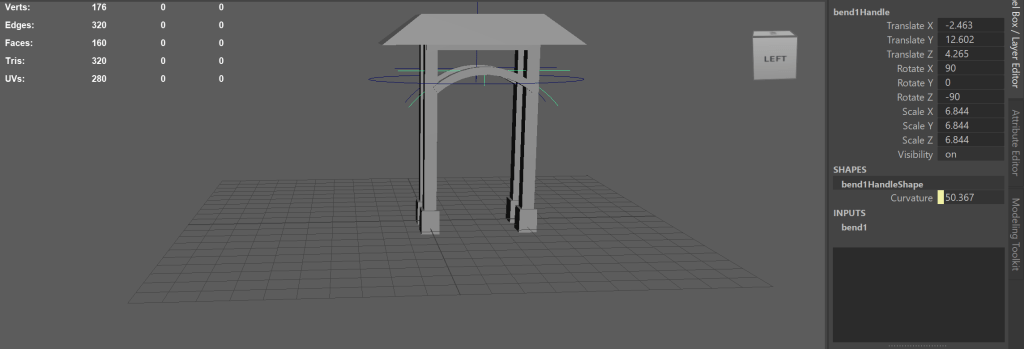
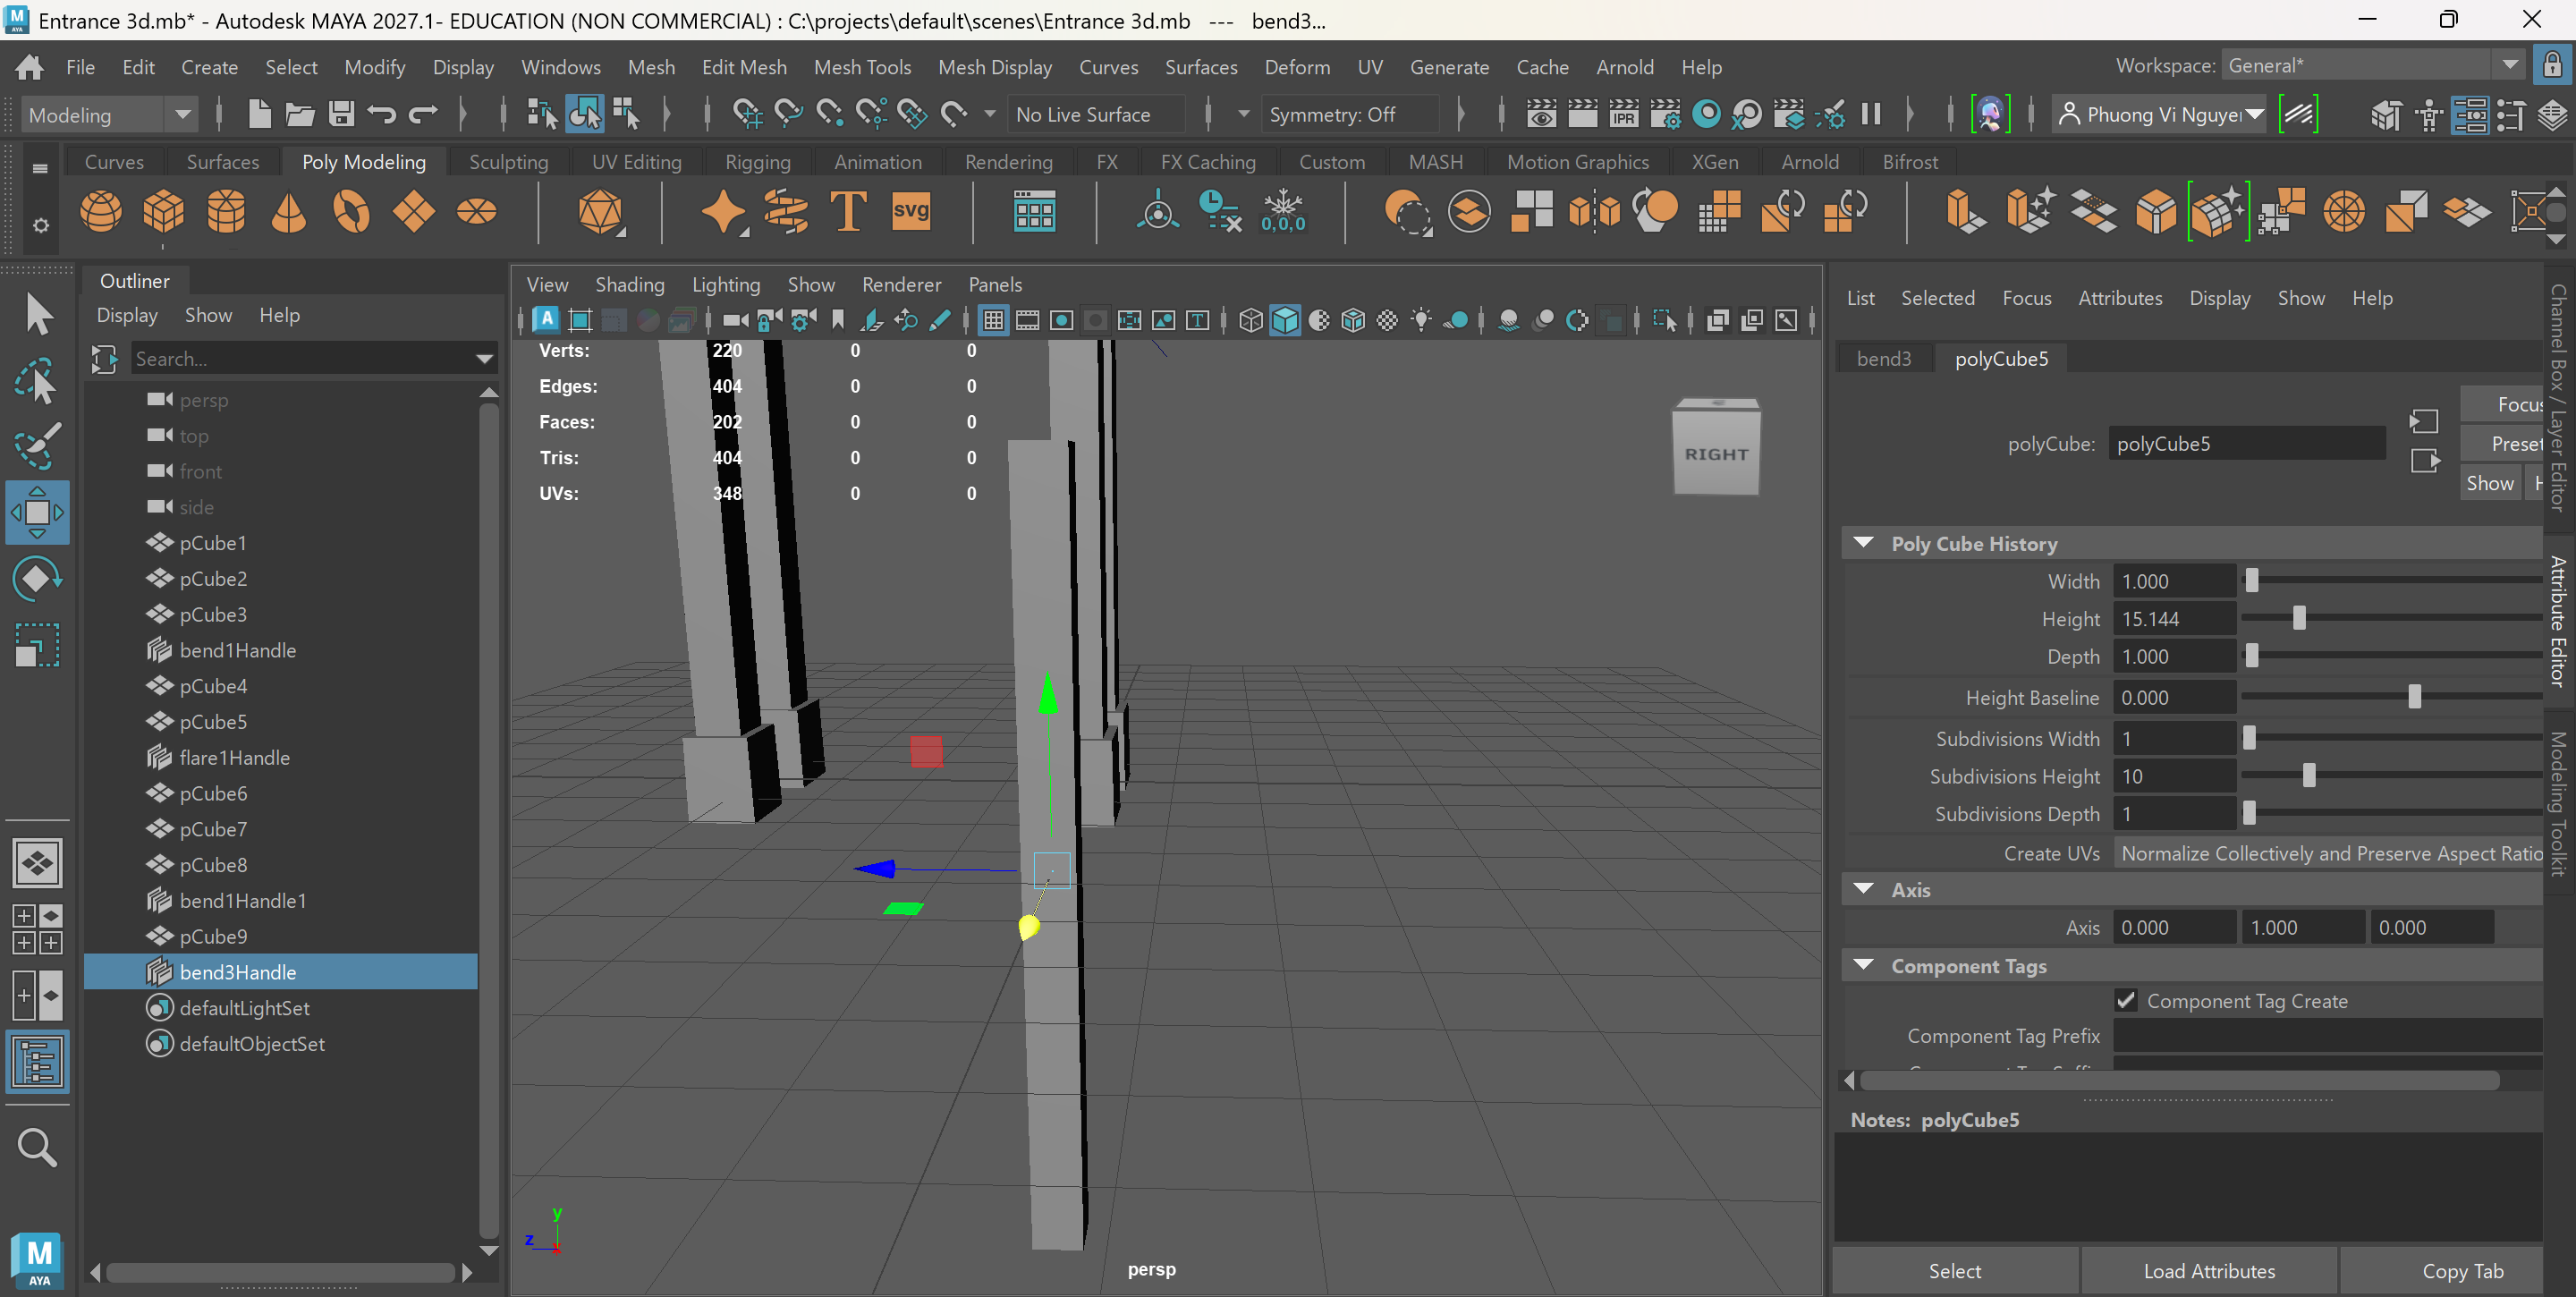
Setting the height for the column then I add more subdivision (this is the important part).
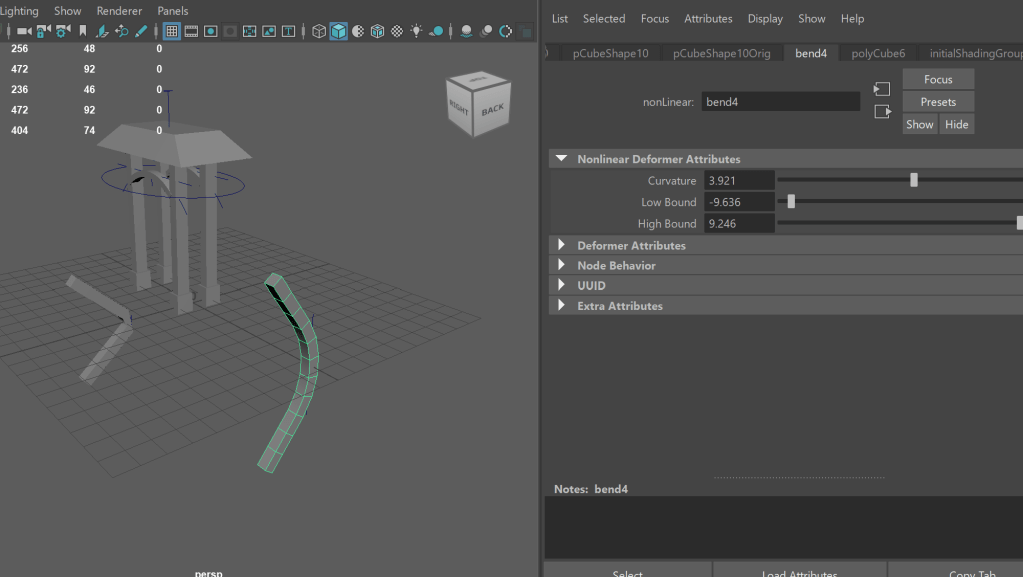
The subdivision helped to bend more curve.
After all, I think Maya is a helpful software that can allow designers to model in 3D which showcases their design. I found out that the important part of using maya is setting the scale because I was struggling with it for 3D printing. I need to set the right size, so the models can be printed out (1:1000 -> m:mm). In addition, learning using tools in Maya is not so hard as I thought before because there are many videos in Youtube can help me with it. I mostly praticed while watching Youtube for Tutorial.
Moreover, Twinmotion is easier to apply material and other element than Maya which I just need to search and drag what I want into my models. The weakness of it, the software is too heavy which made my laptop crashed out and laging when I opened it.
3D modeling
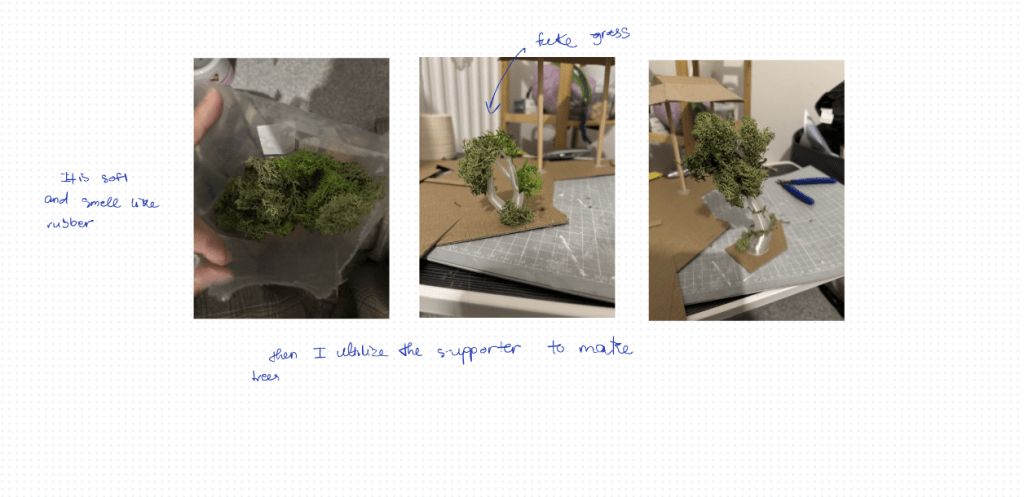
Photoshop: Design sheets
This semester, I still used Photoshop Adobe to do my design sheets. The different part is I experiment with another size of design sheet, A0. The reason for this that I saw many design sheets in the Ba exhibtion were in A0 or larger size than A3. So, I think It would be helpful if I had praticed with large size of design sheets before.
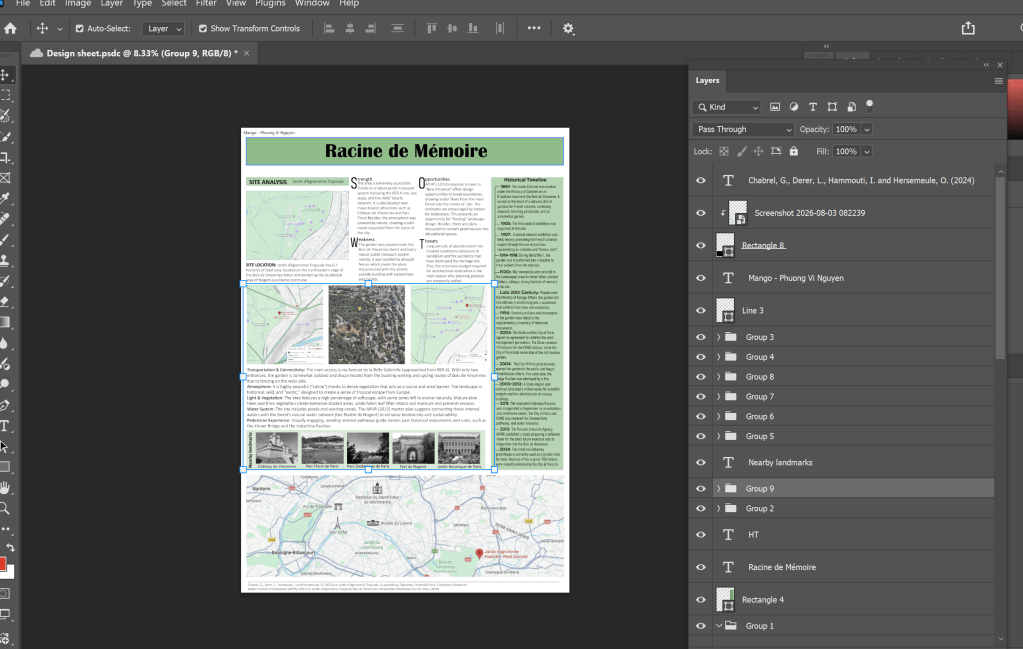
Everything is still the same as last semester but I was struggling with managing the elements of the design sheets because of theA0 size. I had to put them in group such as the line and in the timeline board is in a seperate group from the text. This helped me managed better.
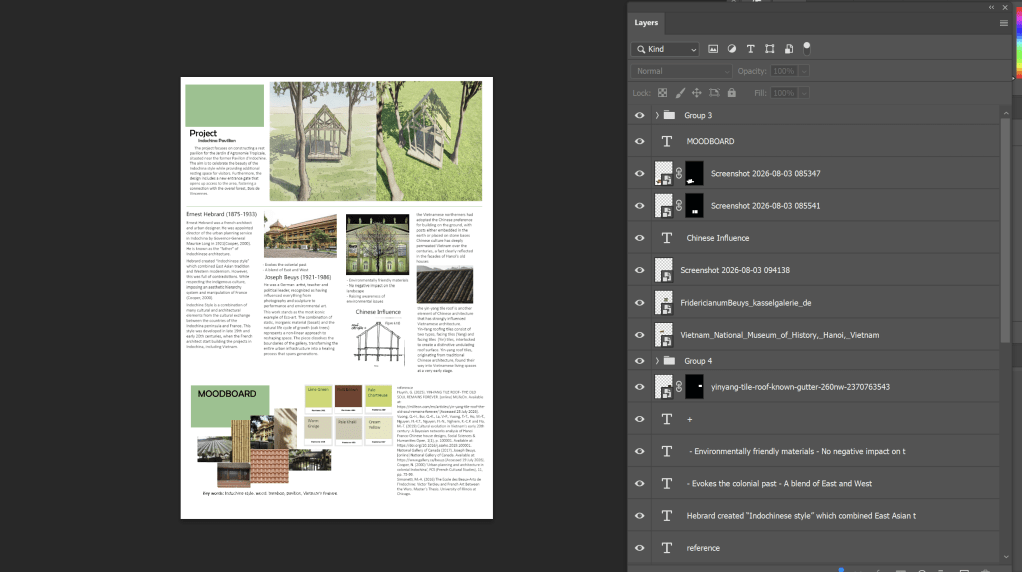
This sheet has less element than the first so I did not use Group for it much.
After managing elements, A0 also caused my laptop lagging badly. So, I came to the library to use the uni’s computer to do my design sheets
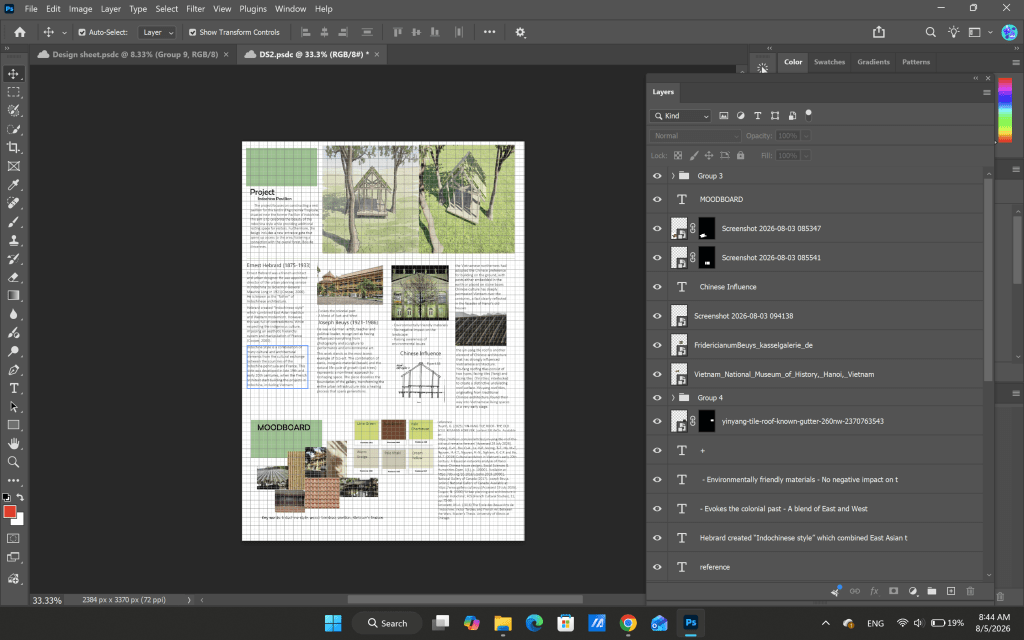
Also, to help me manage sheets and element I turned on the grid ( Ctrl + ‘) to arrange element easier.
Evaluation:
This semester, I have learnt many new skills and software to produce artworks, such as Maya and 3D printing. From research and mood board, I had developed some ideas of pavilions. My project is about making a pavilion and new entrance for Jardin d’agronomie tropicale in Bois de Vincennes Forest. Although I was struggling, I still enjoyed the process of the digital module which allows me to improve my digital skills for my academy years and the future. This evaluation will explain my digital journey for the project this semester.
During the process, I was introduced to Maya, a 3D modelling software, allows me to build my models. I explored how to invest each function of the buttons, creating irregular shapes in 3D space, and learning how to switch perspectives. Thereby, I realised that Maya can give a big potential on making 3D models for the industry. I found out Maya has many functions, including animation, 3D modelling and rendering. Working with shape is the most interesting part of the process. Maya allows me to model and create different shapes. such as the shape of a bamboo stalk cut in half. But working with the sphere shape and inserting the texture and materials were more difficult which needed more work and effort. I was struggling with controlling the vertex and the faces of the sphere shape because sphere shapes have many of them. But I think I can improve it by practicing more. For inserting the material, I found out that using Twinmotion is easier since I did not need many operations and it also allowed me to set the landscape or background easily. However, the weakness of Twinmotion is that it is too heavy to work on my personal laptop which causes my laptop to crash out and lose files at the last minute. I think next time, I will practice with it more on university’s PC, stronger for heavy software. Therefore, I think Twinmotion and Maya are a good combination for 3D modelling and architectural visualization. They support each other in many ways. I made the models of the structures and the shapes in Maya and then exported them to Twinmotion to add more objects for the background and add material for the pavilion I made. If I can do it again this semester, I want to do more animation for my project which will show how people use my pavilion. That will help me visualize and explain the purpose of my project better.
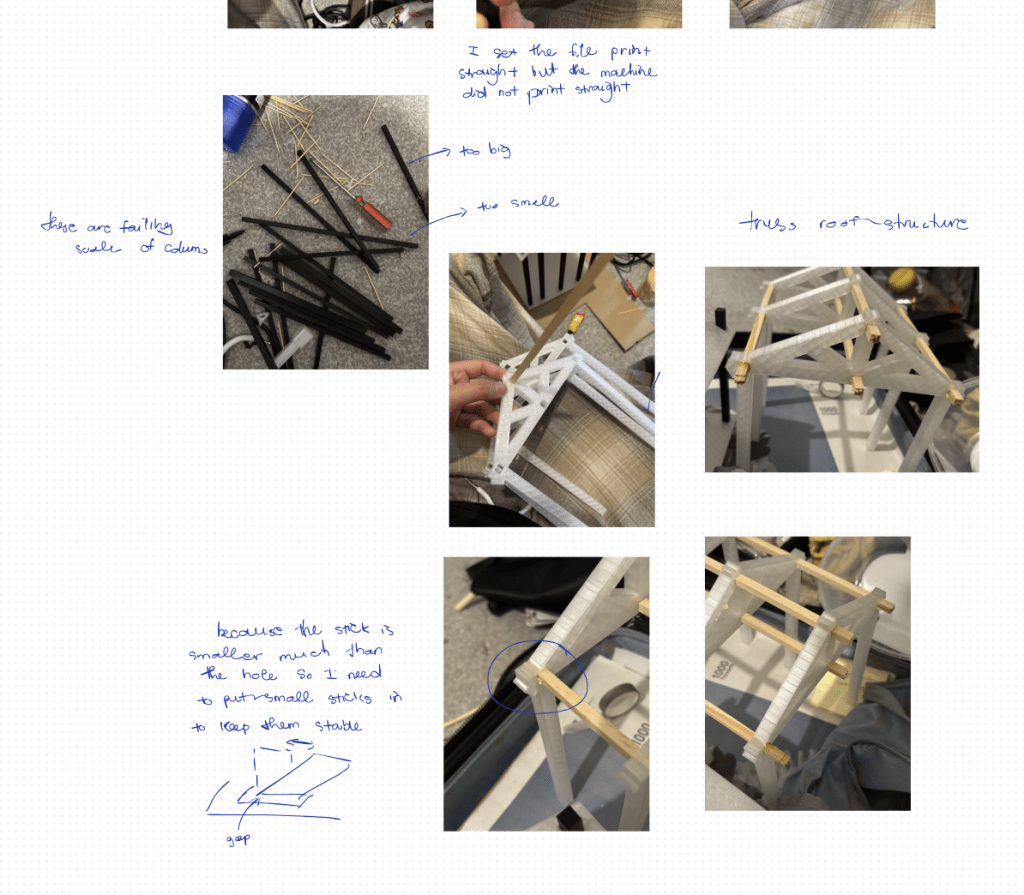
Due to the structure comprising multiple joints, the components must be separated to prepare the file before 3D printing is the hardest part of the whole process. The reason for this is that I did not understand the grid and the scale of maya so well which caused me to waste time on making 3D models but cannot be printed out because of their small size. To fix it, I booked an appointment with a tutor from the print workshop, he explained how it works for me such as I needed to make the hole bigger than the columns so I can insert the post section into the hole after printing to form a connection. I had to experiment with the Bamboo studio software to understand the scale and visualise how it can be prepared for printing. This helped me become familiar with 3D printing and setting the file better in the future.
Furthermore, this semester I did my design sheets in a larger size than last semester in Photoshop, I experimented that with a larger size which I need to control and organise layers smartly for not mixing up everything. I set elements with different groups such as text groups and line groups. This helped me improve my Photoshop skills which I will use for both my academic years and the future because most architecture design sheets are in A0 or A1. But with the large size, they also caused my laptop lagging. In addition, there were digital skills that I did not learn in this semester as I planned before, which was Autocad and Laser cutting. The reason for this is that I did not plan so well and I had health problems during the semester. But for AutoCad, I learnt some basic controlling, and I learnt a little bit about preparing file before printing for laser cutting which I did not use for my project. Even though I did not learn so well in these skills, I still had quick experiments with them. In conclusion, this semester is an interesting journey, I have improved my old skills and learnt new skills so well. Although I had to deal with many side issues such as my health problems, I still enjoy the project of what I have done. I think this journey is a valuable practice for my future